Tag: Blender Beginners Guide

  • Reverie in Blender: A Guide to Geometry Nodes, Animation, and Scene Composition

    Reverie in Blender: A Guide to Geometry Nodes, Animation, and Scene Composition


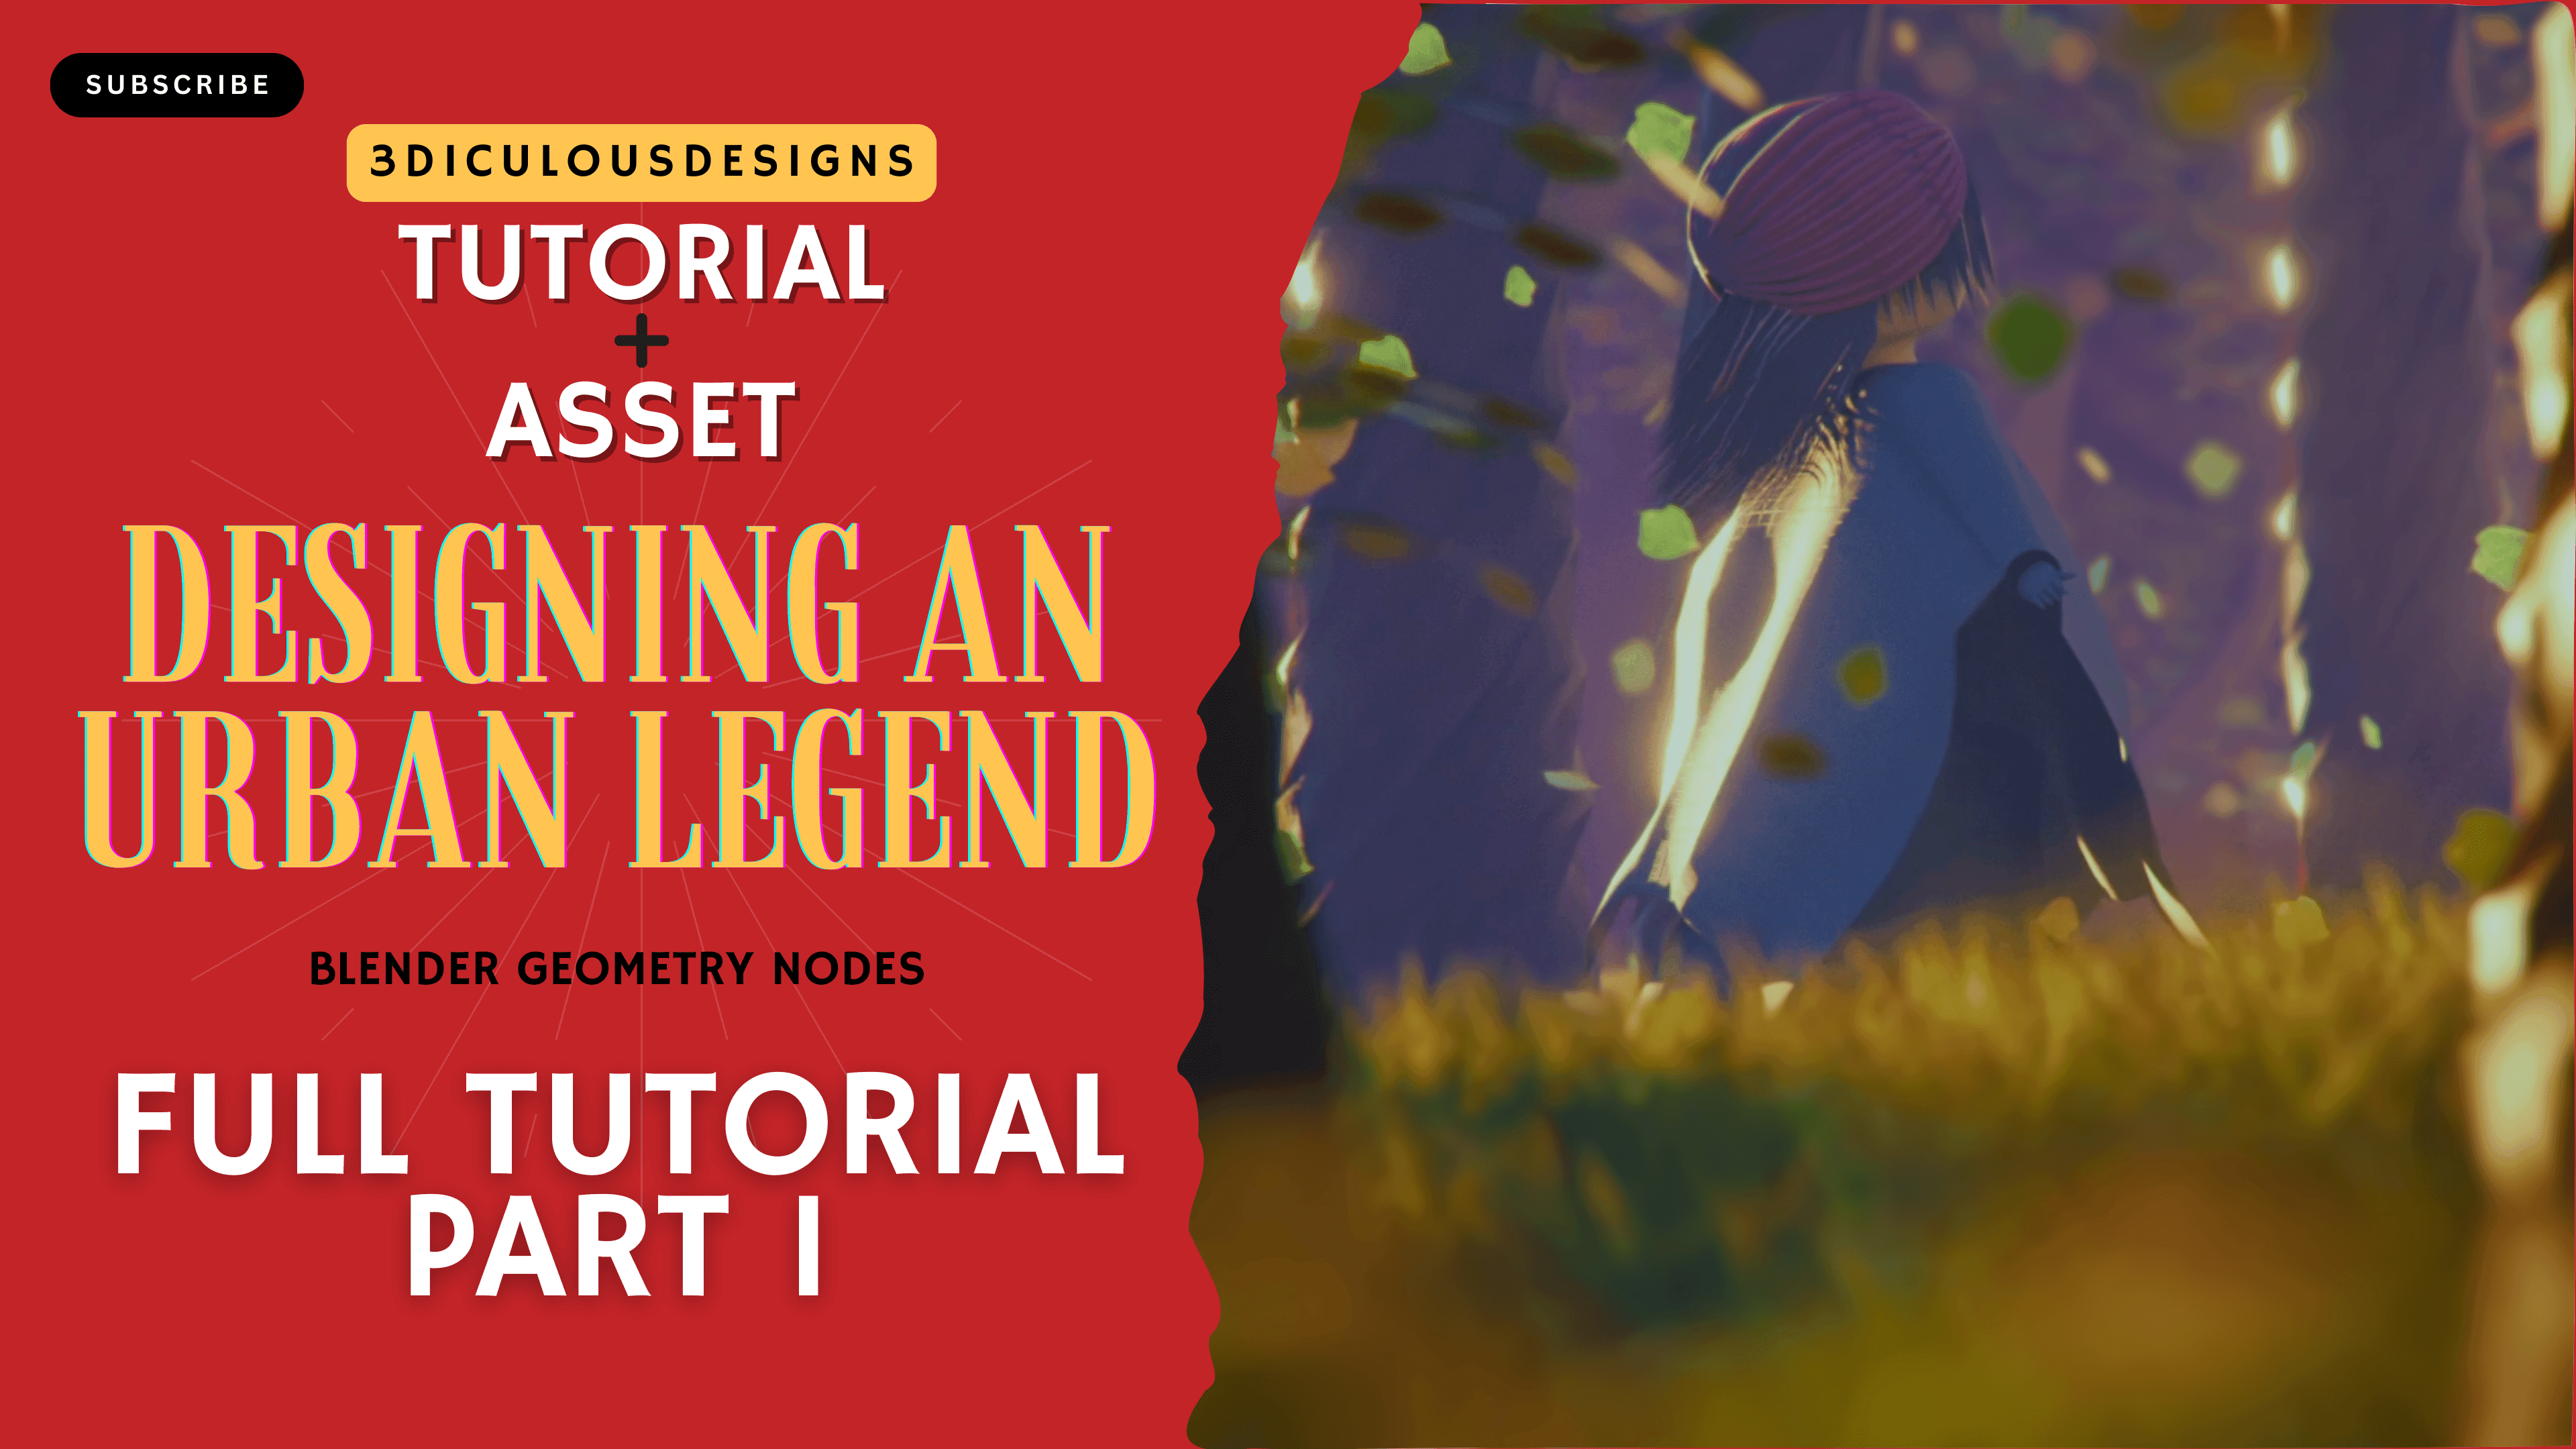
    Create a Magical 3D Scene with Blender Geometry Nodes

    Are you ready to dive into the mystical world of 3D design? In this step-by-step Blender tutorial, we’ll craft an enchanting urban legend scene inspired by an old Sufi mystic’s tale. Using Geometry Nodes, particle systems, and creative material setups, you’ll learn how to bring swirling cloth, dancing trees, and a trance-induced character to life. Perfect for beginners and young artists, there is also a video series that breaks down complex tools into simple, creative steps. Let’s get started!


    Part 1 – Crafting the Mystic Character with Geometry Nodes

    Setting Up the Base Structure

    1. Starting with Curves: Begin by creating a curve line in Blender. Resample it to 3-4 points to form the skeleton of your character’s robe.
    2. Arc Adjustments: Use an Arc Node set to 180 degrees to shape the curve into a semicircle. Adjust the radius and position to create a flowing silhouette.
    3. Noise for Realism: Add a Noise Group (pre-built or custom) to introduce natural wrinkles and movement to the cloth. Adjust the scale and detail to mimic fabric folds.

    Animating the Cloth

    1. Slow-Motion Effect: Lower the frame rate to 15 FPS and extend the animation timeline to 250 frames for a dreamy, slow-motion swirl.
    2. Rotation Keyframes: Use Transform Nodes to animate rotations. Keyframe the Z-axis rotation from 0 to 180 degrees for a hypnotic spin.
    3. Dynamic Simulation: Combine Capture Attributes and Float Curves to control how different parts of the cloth react to movement (e.g., wider sleeves sway more).

    Designing the Hands and Turban

    1. Hands from Curves: Create finger-like shapes using Quadratic Bezier Curves. Instance them symmetrically using Repeat Zones and adjust rotations for a natural grip.
    2. Turban with Spirals: Build a turban using two mirrored Spiral Curves. Use Curve to Mesh nodes and adjust radii to create layered cloth effects.
    3. For More details on Part 1, please refer the full video series.

    Part 2 – Building the Enchanted Environment

    Distributing Trees and Grass

    1. Tree Placement: Use a Grid Node with a Noise Texture to scatter trees dynamically. Exclude areas near the character using Proximity Nodes.
    2. Grass Blades: Design grass using Curve Lines with randomized height and rotation. Instance them across a plane with Distribute Points on Faces.

    Particle Systems for Falling Leaves

    1. Leaf Particles: Generate points above the scene, animate them falling with gravity using Set Position Nodes, and instance simple leaf meshes.
    2. Random Motion: Add Noise Textures to the X and Y axes for unpredictable leaf flutters.

    Materials and Lighting

    1. Cloth Material: Mix Voronoi Textures for a woven fabric look. Use blue and maroon color ramps for depth.
    2. Ground Texture: Apply a PBR Texture to the terrain and blend it with green/brown grass materials.
    3. Moody Lighting: Use a Sky Texture with warm tones. Add invisible Reflector Planes to bounce light onto darker areas.
    4. For More details on Part 2, please refer the full video series.

    Final Touches: Compositing and Rendering

    Depth of Field and Fog

    1. Cinematic Blur: Enable Depth of Field on the camera and link it to an Empty for focus control.
    2. Atmospheric Fog: Add a Volumetric Cube with low density to create a hazy, magical ambiance.

    Compositor Tricks

    1. Glow and Bloom: Use the Glare Node set to “Fog Glow” for an ethereal highlight on the mystic’s robe.
    2. Color Grading: Adjust contrast and saturation with Color Balance Nodes to enhance the surreal vibe.

    Conclusion & Resources

    By now, you’ve transformed Blender’s Geometry Nodes into a storytelling tool! Experiment with different noise patterns, animation speeds, and materials to make the scene your own.

    Pro Tips for Beginners:

    • Avoid “node spaghetti” by grouping frequently used nodes (e.g., Noise Groups).
    • Use Ctrl+T to quickly add textures in the Shader Editor.

    Download the Project File: Grab the full Blender scene, including materials and node setups, on Gumroad.

    Explore More Tutorials:


    Stay Connected!

    Follow us on Instagram for daily Blender tips, and subscribe to our YouTube channel for in-depth tutorials. Got questions? Drop a comment below – we love helping budding artists!

    With creativity and patience, you’re now equipped to turn urban legends into breathtaking 3D art. Happy blending! 🌟

    Subscribe to the YouTube Channel for more tutorials


  • Blender Tutorial: Crafting a Winter-Themed Diorama with Geometry Nodes

    Blender Tutorial: Crafting a Winter-Themed Diorama with Geometry Nodes

    Create a Magical Winter Scene in Blender Using Geometry Nodes

    If you’ve ever wanted to design a cozy winter wonderland in Blender, this step-by-step tutorial is your gateway to mastering Geometry Nodes. Perfect for beginners and intermediate users, we’ll break down how to build a frosty diorama complete with snowy landscapes, rustic windows, flickering bonfires, and intricate details—all using Blender’s powerful procedural tools. If you want to watch the full video tutorial, the series can be found on this link on Youtube.


    Why Geometry Nodes?

    Geometry Nodes are Blender’s answer to procedural modeling, allowing you to create complex scenes without manually sculpting every detail. For winter scenes—where repetition (like snowflakes or trees) and natural randomness (like terrain) are key—Geometry Nodes save time and add realism.


    Part 1 – Setting the Foundation

    Scene Setup & Basic Structures

    1. Camera and Grid Setup
    • Start with a plane and switch to Geometry Nodes.
    • Add a grid node (size 50×50) to create a base for your terrain.
    • Position the camera at 20 meters height for a bird’s-eye view. Use a 100mm focal length for a cinematic zoom.
    1. Building the Window Frame
    • Create a plane, rotate it 90 degrees, and add loop cuts to carve out a window shape.
    • Use the Solidify Modifier to add thickness to the frame. Assign materials (wood for the frame, glass for panes) for realism.
    1. Interior Detailing
    • Add a table using a scaled plane with a solidify modifier.
    • Place a point light inside the room to simulate warm indoor lighting contrasting with the cold exterior.

    Pro Tip: Use Viewport Display Alpha to make materials semi-transparent for easier editing.


    Part 2 – Terrain, Bonfires, and Props

    H3: Snowy Terrain with Noise Textures

    1. Procedural Snow Layers
    • Add a Noise Texture node to a grid, using math nodes to control elevation.
    • Subtract 0.5 from the noise output to center terrain fluctuations.
    1. Creating a Bonfire
    • Model firewood using curves resampled into cylinders.
    • Add randomness to rotation and scale using Random Value nodes.
    • For flames, use a sphere with a noise-driven Set Position node to create organic shapes.
    1. Adding Characters
    • Import low-poly human models (FBX files) and position them around the bonfire.
    • Use Collection Info nodes to instance characters within Geometry Nodes.

    Key Takeaway: Combine Distribute Points on Faces with Instance on Points to scatter props like rocks or logs naturally.


    Part 3 – Final Touches: Trees, Lighting, and Materials

    H3: Crafting Winter Trees

    1. Procedural Pine Trees
    • Use curve-based trunks and instance icospheres as foliage.
    • Add randomness to branch angles and scales for variation.
    1. Snow-Covered Branches
    • Apply a White Emission material with subtle noise for frosty texture.

    Lighting and Atmosphere

    1. Exterior Lighting
    • Use a cold HDRI for ambient light.
    • Add area lights near the window to cast warm glows onto snow.
    1. Material Magic
    • Snow: Mix a white principled BSDF with a bump map from noise textures.
    • Ice: Use a glass BSDF with low roughness and a blue tint.

    Compositing for Realism

    • In the Compositor, add glare (Fog Glow) for firelight and adjust contrast to enhance shadows.
    • Follow techniques from YouTuber Robin Squares for cinematic post-processing.

    Key Takeaways

    • Geometry Nodes streamline repetitive tasks like terrain generation and prop scattering.
    • Noise Textures are essential for organic shapes (snow, flames, terrain).
    • Lighting Contrast (warm vs. cold) adds depth to winter scenes.
    • Procedural Materials reduce manual texturing work.

    Conclusion

    Blender’s Geometry Nodes unlock endless creativity for seasonal scenes. Whether you’re crafting a serene winter cabin or a bustling holiday village, this tutorial equips you with the skills to blend procedural efficiency with artistic flair. Now, grab a hot cocoa, fire up Blender, and let it snow! ❄️


    Learn to create a winter-themed diorama in Blender using Geometry Nodes! Step-by-step guide for terrain, props, lighting, and materials. Perfect for beginners.

    f